You already know that making easy as possible for your customers to pay is essential for increasing conversions and sales.
As a small business or website owner you want your customers’ purchasing experience on your site to be as seamless and positive as possible — which includes, at its most essential, the checkout experience.
You’ll wonder but there are websites that offer only one payment method. Just ask yourself, Is that enough? while you can also accept cryptocurrency on WordPress site.
However, data highlighted in an infographic from Milo shows that 56% of respondents expect a variety of payment options on the checkout page.

Then why do settle with one payment method while you can add numerous payment methods?
While it’s not necessary also because of your target audience, you’ll need to take a look at your target audience to see which payment methods they use.
And of course, if your customers use Amazon for shopping then chances becomes high that they also use Amazon pay to check out the payment. That’s the big reason to add Amazon pay to your website.
Why Amazon Pay may be a good payment option
Amazon Pay let your buyers a great experience they already trust with Amazon.
It enables millions of Amazon buyers to purchase on your site using the payment and shipping information in their Amazon accounts.
Your customers just need to log in using their Amazon username and password without leaving your website. When customers use Amazon Pay, you get the customer’s name, email address and zip code to complete the order and personalize their checkout experience.
- Orders are passed to Amazon Payments
- You’re covered by Amazon Payments’ proven fraud protection
- Customers stay on your site during the entire checkout process
How to Integrate Amazon Pay to WordPress Using Woocommerce
Now the question is “how do I integrate Amazon Pay Checkout in WooCommerce?”
So in this tutorial, I’ll show what you need and walk through the steps of how to set up Amazon Pay in WooCommerce store.
First of all, you’ll need a WooCommerce e-commerce store to integrate with.
WooCommerce should be the best solution yet when it comes to setting up an online store. The platform offers almost all of the functionality you need to sell products online. If you’re looking to set up an online store on a budget, or even power a large enterprise, WooCommerce could be ideal.
Learning how to set up WooCommerce is relatively straightforward. Once you set up WooCommerce. you can configure which payment methods you want to accept. WooCommerce only supports PayPal and Stripe by default, but you can add further gateways using extensions including Amazon pay: To do this follow below steps.
- Login to WooCoomerce account
- Navigate to Extention store > Payment on the navigation
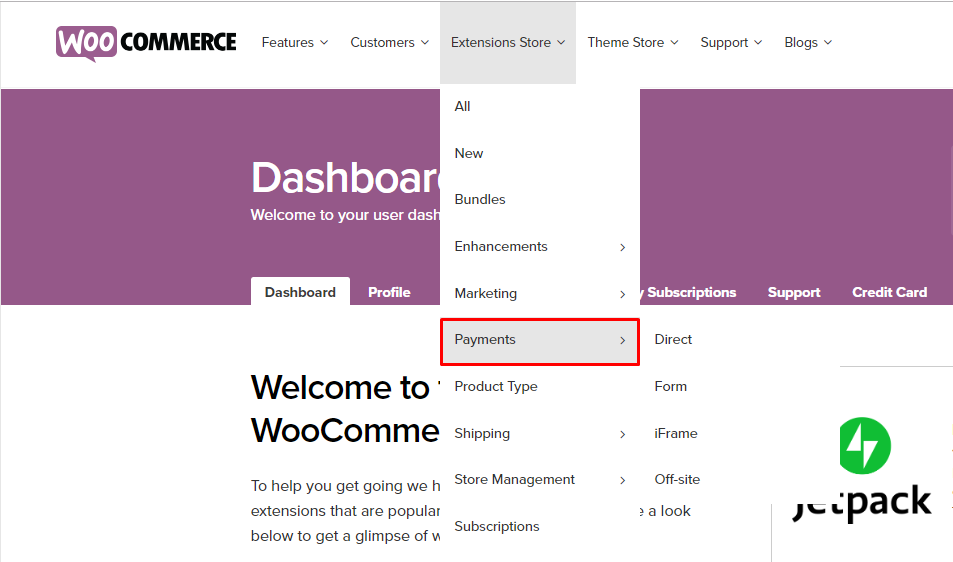
- Click on Payments and find the Amazon Pay extension:
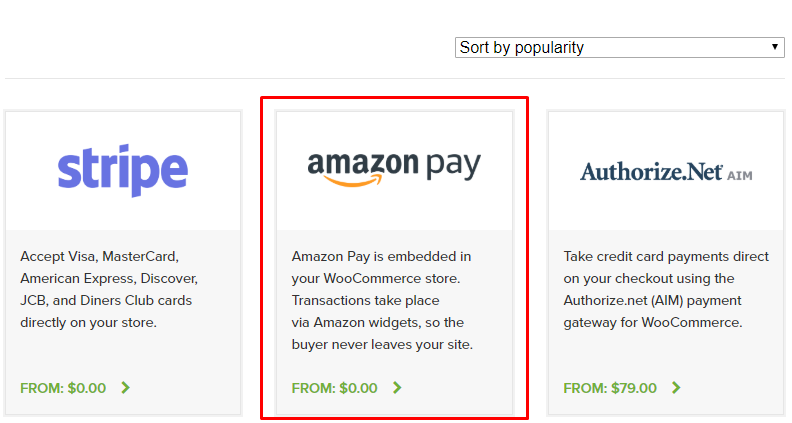
Once you find, click on this extension and in the next screen, you’ll get their subscription option. Luckily this extension is free of cost. Maybe WooCommerce will ask you to fillup billing details before proceed to download, so just fill up the details, add the extension in the cart and you can able to download very easily.
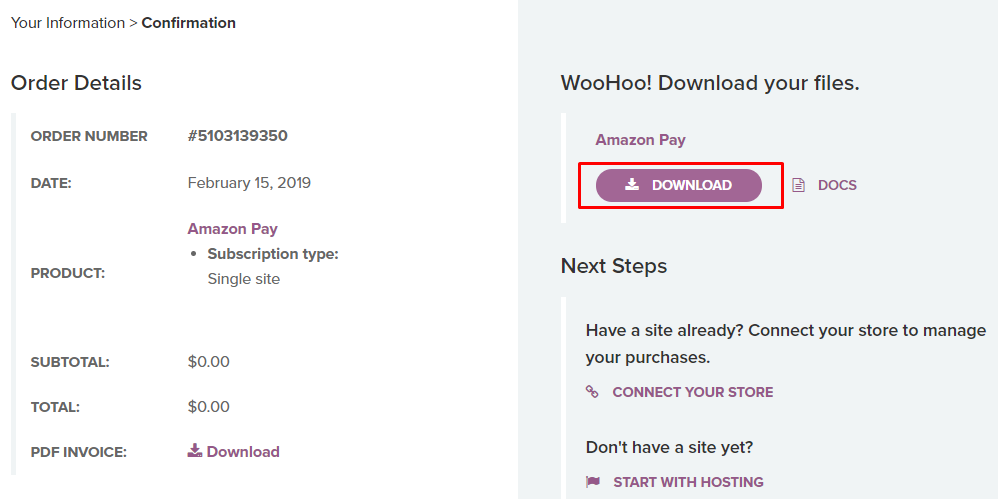
Once you download the Amazon pay extension. You’ll need to install and activate the plugin (extension) to reflect in WoCommerce payment methods.
Note: Downloadable file would be in a .rar format, so you must convert in a .zip format before uploading to WordPress.
Next, you’ll need to enabled and set up Amazon pay.
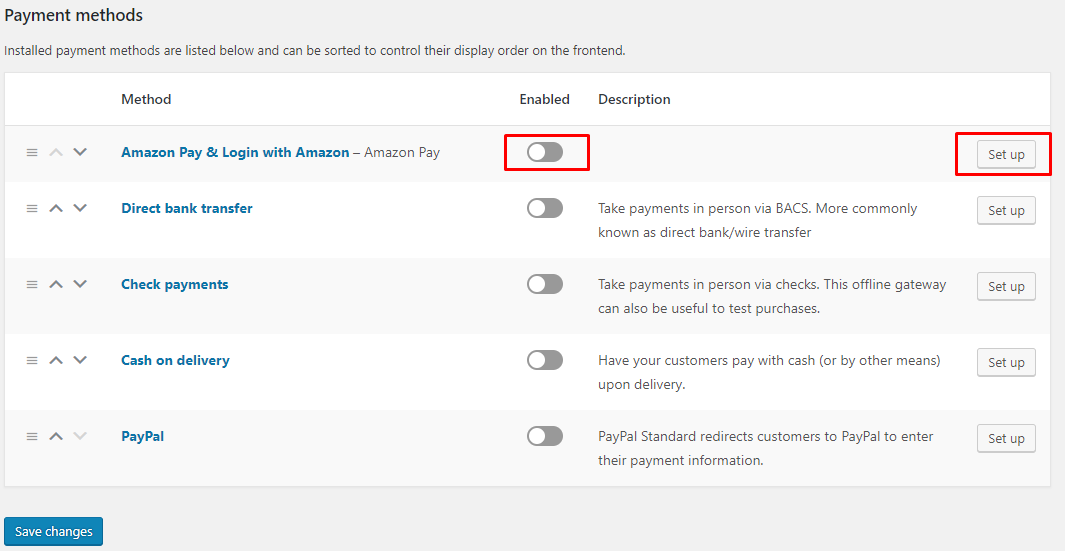
Now, this is an important part of the tutorial cause we need some amazon account details to complete the setup.
Amazon Account details we’ll need
- Seller ID (Mercent ID – usually find under settings > Integration in amazon merchant account)
- MWS Access Key (You can get these keys by logging into seller central under Integration tab)
- MWS Secret Key
- App Client ID
- App Client Secret
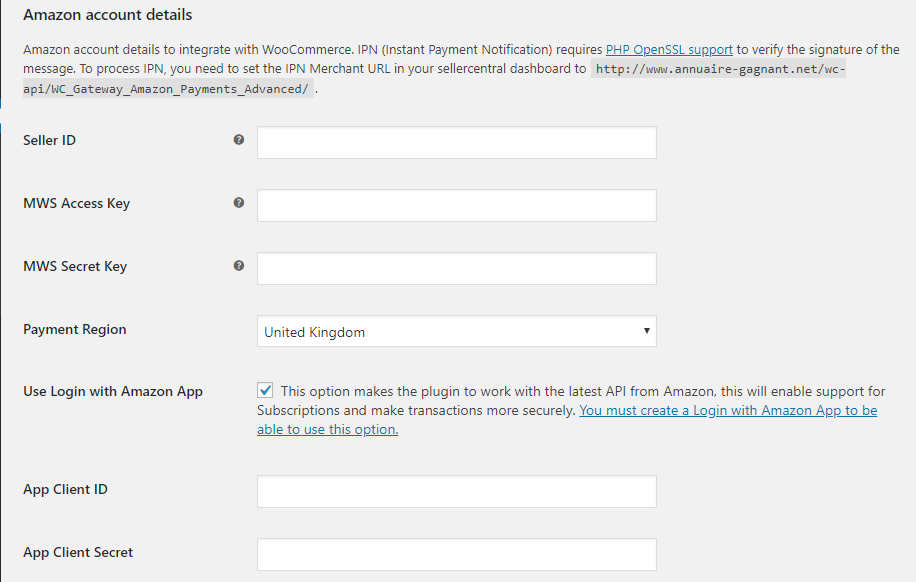
To get these details, you’ll need to have a Seller Central account of Amazon and get information related to your merchant payment credentials to be entered in boxes, here is the video tutorial.
Once you fill up all details and enabled Amazon Pay, it will show the Amazon banner or logo at checkout page on every WooCommerce products.
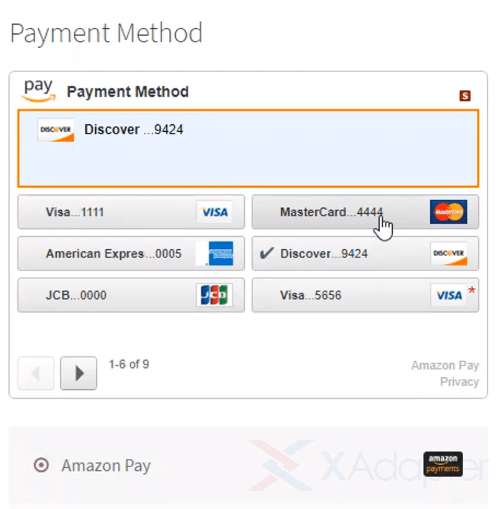
A user needs to login to their Amazon account while checkout and they can find all the payment details saved in their Amazon Account.
You’ll also noticed there are a number of vendors who have developed their own versions of Amazon payment gateway for WordPress. There are free as well as premium plugins. So basically procedure would be the same as getting all this account information is mandatory on any plugin but maybe you’ll get a different interface, different features.
There is another plugin which works the same but has nice features named XAdapter. This plugin will let you see all Amazon overview Page that displays all your payment transactions and overview page also helps you to process partial and full refunds in a single click. You can get this the plugin for 59$. The price is little high but you have to consider whether you need it or not
This is the tutorials of how to integrate Amazon pay to WordPress. Hope you understood all the things you wanted to know. If we forgetting something or wanted to know more, you can comment down below and we’ll surely guide you.
